You can add an unlimited number of cars and motorcycles to the ARBA Auto app. Right after registration in your “garage” you will find one car created by default.
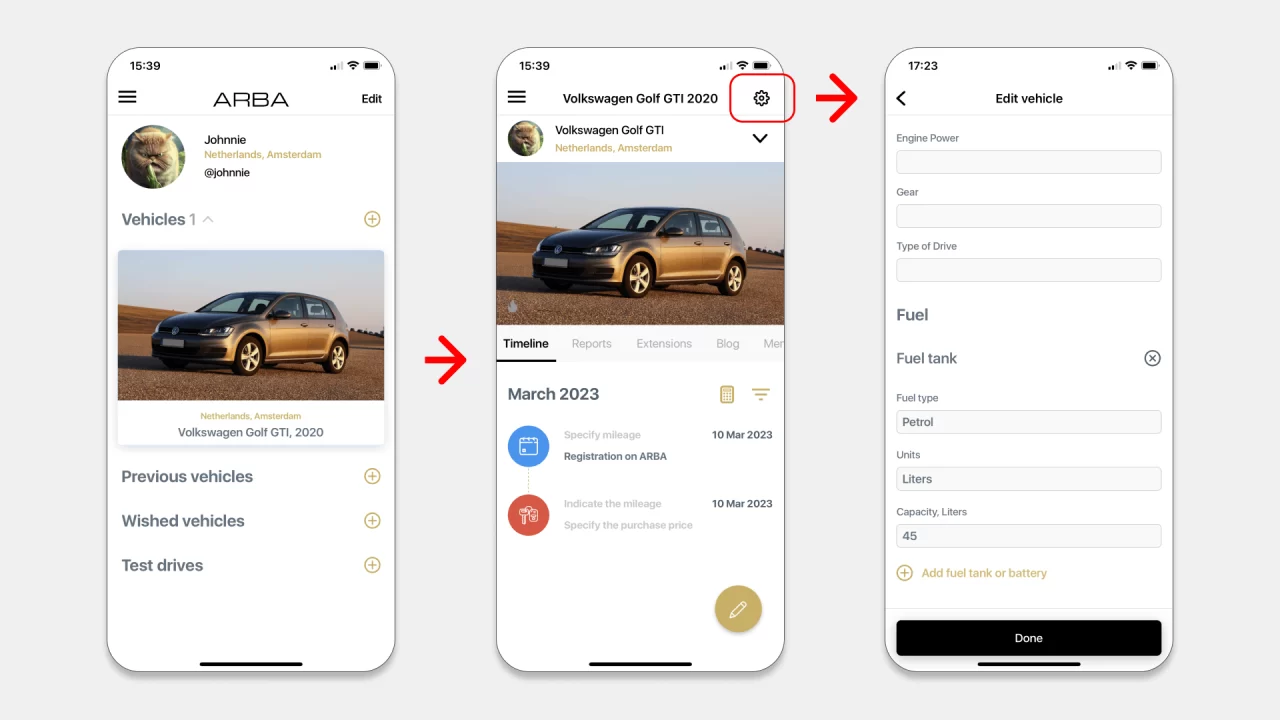
After registering in the application, it is recommended to check and clarify the selected settings necessary for the correct accounting of mileage and expenses. In order to go to settings, navigate to the car screen and click on the icon in the upper right corner in the form of a gear. In the menu that appears, click the “Edit” button.
Here you can:
- Change vehicle name, brand, model, year of manufacture. If you did not find your brand or model in the directory, please let us know via this form and we will promptly add it.
- Upload vehicle’s photo;
- Fill in the Specifications section (Engine power, Gear, Type of drive) and it will be displayed in the Details tab.
- If you want to run a public car blog, please provide a name for the link. The blog will be published at https://arba.club/v/yourname, where “yourname” is the value of the “web name” field. This field must be unique and contain symbols and numbers.
- Fill in the VIN field – it is used only for your notes, it is not published anywhere and is not used in any way;
- Specify odometer units (miles/km);
- Add up to 3 types of fuel. Correctly specify units of measure and tank/battery capacity as these values will be used in fuel consumption calculations.
If you plan to keep track of expenses for this vehicle, it is recommended that you enter the purchase price of the vehicle, the mileage at the time of purchase, and the mileage at the time of registration with ARBA Auto. To do this, go to the “Timeline” tab, where you will find the first two entries in which you need to specify this data.
To activate additional paid features for your car, go to the “Extensions” tab.
In the ARBA Auto app, you can add an unlimited number of cars, not only for accounting purposes, but also to create a collection of cars that you had, have, will have, and even cars that you took for a test drive or for rent.
To do this, the application has 4 corresponding groups and you can move cars between groups: navigate to the car, click the gear icon in the upper right corner and then the “Move to…” button. Select a group. You will see the result on the screen of your account (click on the user’s profile picture to go).
To delete a car, click on the gear icon and then on the “Delete” button.
Attention! All information relating to this vehicle will be permanently deleted.